Send automatic (out of office) replies in Outlook on the web
Choose your version for instructions
The instructions are slightly different depending on whether you’re using the new Outlook on the web. Choose which version of Outlook on the web you’re using to see the steps that apply to you.
IF YOUR MAILBOX LOOKS LIKE…

See Instructions for the new Outlook on the web.
IF YOUR MAILBOX LOOKS LIKE…

See Instructions for classic Outlook on the web.
Note: If your organization has included its logo in the toolbar, you might see something slightly different than shown above.
Instructions for the new Outlook on the web
- Sign in to Outlook on the web.
- At the top of the page, select Settings
> View all Outlook settings > Mail > Automatic replies.
- Select the Turn on automatic replies toggle.
- Select the Send replies only during a time period check box, and then enter a start and end time.If you don’t set a time period, your automatic reply remains on until you turn it off by selecting the Automatic replies on toggle.
- Select the check box for any of the following options that you’re interested in:
- Block my calendar for this period
- Automatically decline new invitations for events that occur during this period
- Decline and cancel my meetings during this period
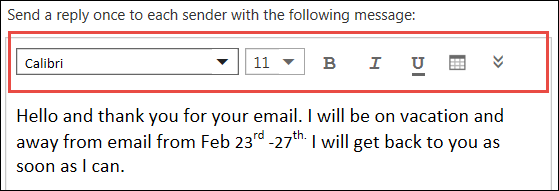
- In the box at the bottom of the window, type a message to send to people during the time you’re away.If you like, you can use the formatting options at the top of the box to change the font and color of the text or customize your message in other ways.
- If you want senders outside your organization to get automatic replies, select the check box for Send replies outside your organization.
- When you’re done, select Save at the top of the window.
If you didn’t set a time period for automatic replies (step 4 earlier), you’ll need to turn them off manually. To turn off automatic replies, sign in to Outlook on the web, choose Settings  > View full settings > Mail > Automatic replies and then select the Automatic replies on toggle.
Instructions for classic Outlook on the web
- Sign in to Outlook on the web.
- On the nav bar, choose Settings > Automatic replies.
- Choose the Send automatic replies option.
- Select the Send replies only during this time period check box, and then enter a start and end time to control when automatic replies are sent.If you don’t set a time period, your automatic reply remains on until you turn it off by selecting Don’t send automatic replies.
- Select the check box for any of the following options that you’re interested in:
- Block my calendar for this period
- Automatically decline new invitations for events that occur during this period
- Decline and cancel my meetings during this period
If you want senders outside your organization to get automatic replies, select the check box for Send automatic reply messages to senders outside my organization.
- In the box at the bottom of the window, type a message to send to people during the time you’re away.
- If you like, you can highlight your message and use the formatting options at the top of the box to change the font and color of the text, add an emoji, or customize your message in other ways.

- When you’re done, choose OK at the top of the page.
If you didn’t set a time period for automatic replies (step 4 earlier), you’ll need to turn them off manually. To turn off automatic replies, sign in to Outlook on the web, choose Settings > Automatic replies and then select Don’t send automatic replies.